The term investment is to be divided as far as possible into two parts. The general appointment system and the selection of visitors. To create an appointment, at least the event and the start and end dates are required. All other fields are optional, but should be used as well as possible.
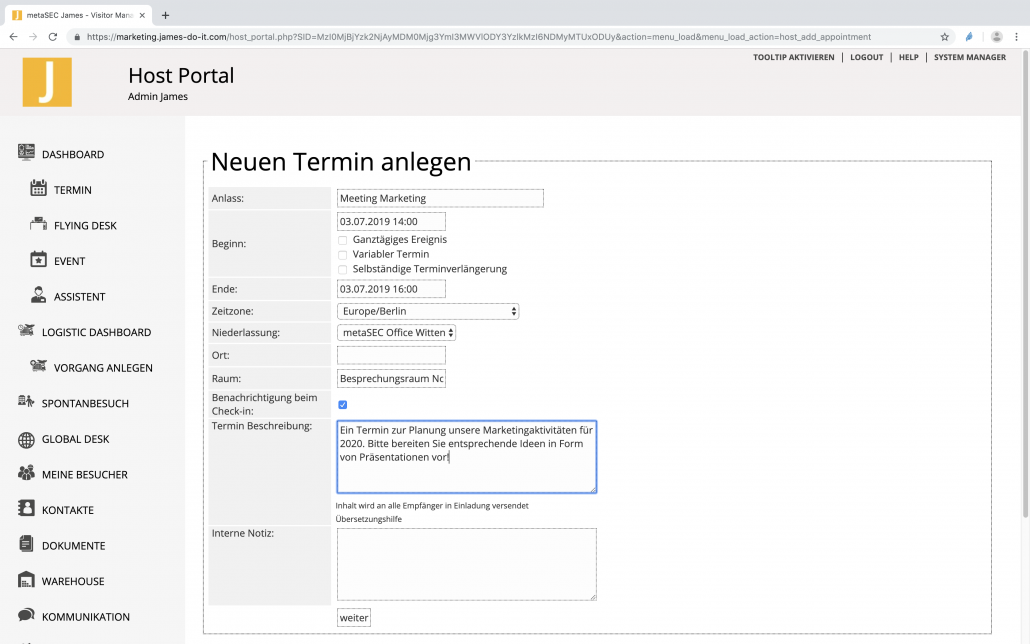
After the basic details have been entered and the appointment has been saved by clicking “Next”, the guests must be selected. The mandatory fields here are e-mail, surname and first name. The rest is optional, but should also be used if possible. With the button “Phonebook” you can access the internal phone book. Here a single click is enough to transfer the data.
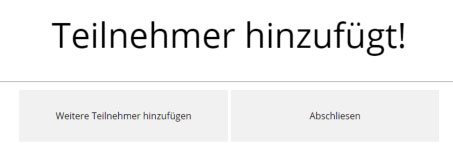
Click “Next” to add the visitor to the appointment. This process can be run through as often as desired. The number of appointment participants is not limited. As soon as the creation of the guests is completed, the appointment is created and the invitations are sent by clicking on “Complete”.
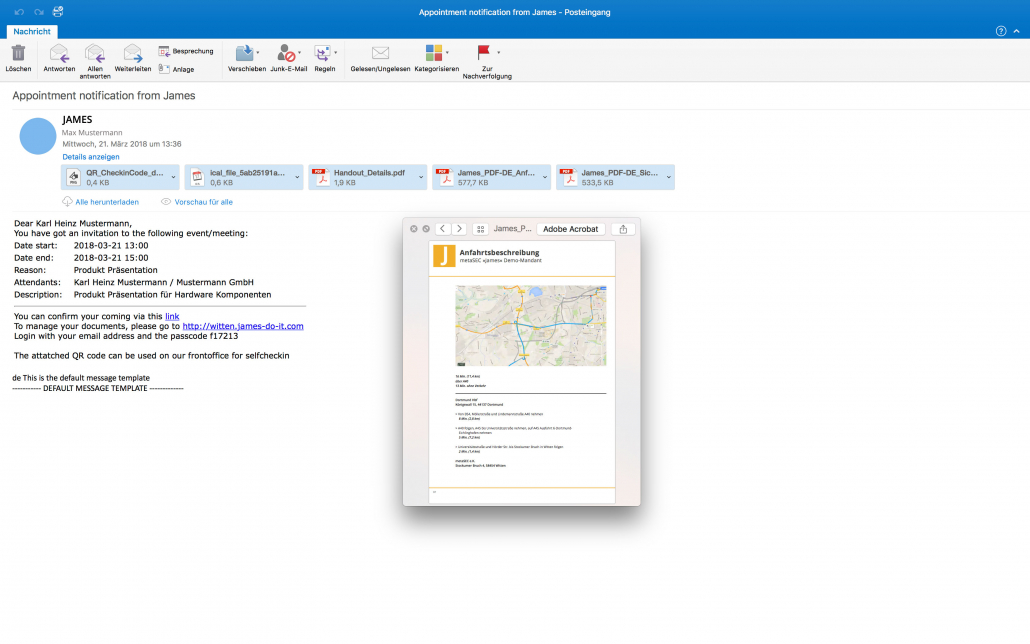
Important: If an appointment requires a release, a note appears. At this time, no invitations are sent to the guests. Only the contact person who has to give the release is notified. Basically two types of messages are sent. The organizer receives an e-mail with the information that the appointment has been successfully scheduled. This e-mail contains only the calendar entry (ical file). The guests receive an e-mail with the invitation.
The e-mail has at least the following attachments:
- QR code for scanning at reception, autonomous columns, etc.
- Appointment entry as iCAL file
- Handout, PDF file with a summary of the appointment
If other files were selected when creating the appointment, these would also be attached to the E-Mail. The text of the e-mail can be customized. The standard template contains the appointment description, the tabular overview of the participants, the global appointment description and possibly the individual message stored with the attachment.